Selecting an object and take photos, preparing for 3D.
Tips for Photogrammetry:
- You should make sure nothing is moving in photo
- Make sure to get plenty of overlap between your photos
- Objects that won't work:
Transparent
Translucent
Shiny
heavily specular
reflective objects
Tool : I-Phone 6s Camera. Light: Nature light from ceiling
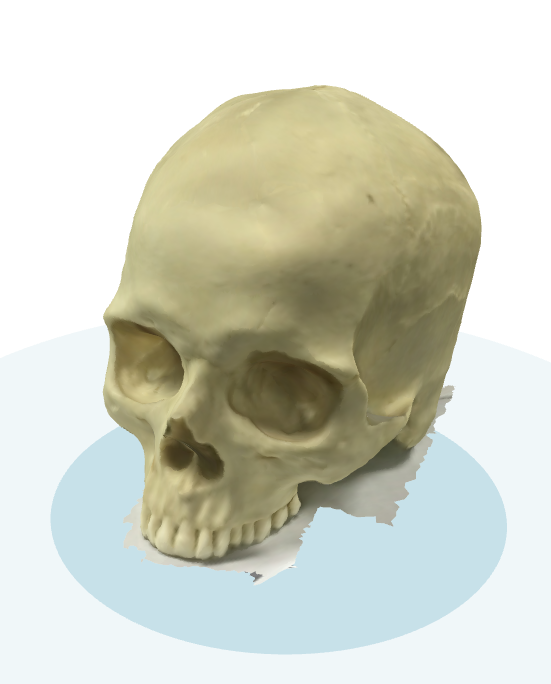
I took 176 photos for the skull. And I put all of them into Autodesk Remake.

 Here are pictures that I took.
I spent about 1 hour to get the model. It doesn't look good.Some parts weren't built well. Although I took many pictures for those missing parts which were in highlight.


I cleaned some meshes. The face was OK but the back was bad. I am looking for solution methods.
Now I am building the jaw model.I only took 41 pictures for the jaw. Building speed will be quicker than the last one. Because there aren't so many pictures as the skull.
I am thinking about adding some marks on the skull so that Remake can recognize each parts. The back part of the skull looks similar.
 Things always stop at 40% progress.
Here is the jaw model.


A part's texture is wrong.
B part - I fill the hole of this part.
The objects that I choose only have single color. Maybe it is tha resaon of those result.
Next time I will add some tapes on it. I promise that I won't hurt the skull and its jaw.
2 Zbrush tutorial
Watch Zbrush tutorials and learn to use Zbrush
New update!
I thought I succeed. Only 65 photos for the skull and jaw had 41 photos. I took photos with my iphone camera. I didn't move the object this time.


No comments:
Post a Comment